Posts

Image
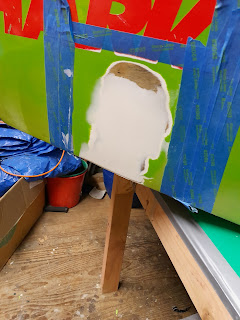
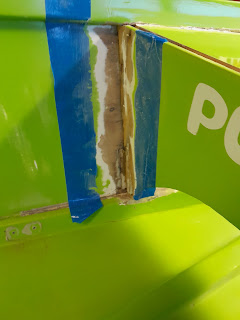
And... Filled the side in. Should look perfect if I can find the right colour paint. And the bit that was under the sticker should look better too.  
Image
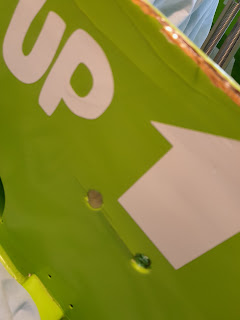
The delaminated bulkhead. Not sure why I ever thought that squishing glue into the delaminated bit at the top was going to solve this. Every place where a hole had been put through the bulkhead, there was delamination. This is where the hiking straps went through,... This is the drain hole. It is like this on both sides of the boat and forward and aft on the bulk head. I tried just chipping these bits away so I could fill them but found the delamination extended a long way in every direction from the holes. So it was back to plan A - replace the bulkhead completely. I'm pretty sure this is a bad idea. When the boat was built, this was probably one of the first bits, with everything then attached to it. I was a little concerned that the boat might change shape when I took it out so screwed a couple of bits of wood across the boat just in case but it doesn't look like anything has moved. Getting it out should have been a problem. I was figuring that this was going to be my excuse...
Image
  More bits from a while ago. The additional bit attached by the thwart  Additional screws in the side into the net bit. (Yup, one of my screws missed. This matches one of the original screws that had missed everything previously. Lesson learned here is that making a pilot hole from the inside would have been better than trying to position the screws by sight).  All this made me worried about what was under the sticker on starboard side. But actually, it was pretty good. Just hadn't been filled evenly enough to hide the screw holes or painted. Nothing broken though! I also decided to chip away the epoxy from the front of the thwart as it had cracked and would probably let water get into the wood.
Image
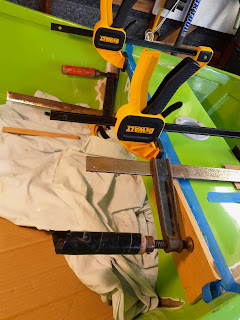
 Day 4 Took off the clamps on the smaller bit of delaminated bulkhead. Looks like the glue got right to the ends of the splitting so happy with that to proceed with the main bit next time... Screwed and glued forward bulkhead to thwart. Outside view and inside view. While visiting Mitre10 and Bunnings in search of stainless screws*, I picked up a colour card which I thought was promising. It wasn't. As a testament to how bad I am with matching colours, I didn't even realise that the inside and outside or Rookie were two different colours...  * Having checked some web sites this today, I did the screw buying bit wrong. 14 x 6gauge, 18mm countersunk stainless screws from Bunnings $6.95. At Burnsco, they are $0.20 each, or $2.80. Kinda expected it to be the other way around from previous experience.
Image
 Day 3 Worked on the least delaminated bit of the bulkhead. I figure that I'd do this one first. If it looks OK then I can do the same with the worse issue. I've masked everything up to protect as much Rookie's greenness as possible. Looked like glue was coming out right to the end of the split so I think this is going to be OK. I'll know better after I've removed the clamps and cleaned of the excess epoxy... While doing the top of the bulkhead, I've noticed that there is some de-lamination around the holes the hiking straps are mounted through... might just have to grind a layer of ply away there and fill it. Also made up a bit of wood to go against the front bulkhead to hold the side where it is broken. The bit of wood was once part of my house so is probably even older than Rookie. Have to admit it took me 3 tries to make a piece that fit well... 
Image
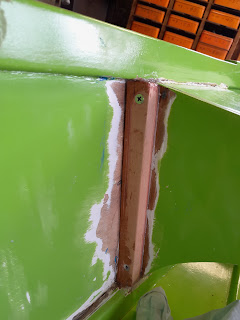
Day 2 Didn't spend a lot of time on it today. Cleaned up where I'm going to add a post to hold the side where it is broken. Figuring on screwing the post to the existing post through the bulkhead as well as epoxy and also putting some small screws from the outside into the new post to ensure no movement around the break. Been wondering about the cracks in the paint on the bulk head... It turns out that the bulk head was stapled to the thwart... The staples have long since rusted away, bubbling up the paint and leaving rust marks. One of todays mysteries is that what remains looks white, as though they were gone before a coat of white paint was applied at some point. But that doesn't explain the rust marks... Having a camera in your pocket is great when trying to see into tight spaces. Except when you find big gaps you didn't know about. (Thwart, starboard side). After further investigation, I'm not worried about it, it is well attached to the gunwale at the top. (th...
Image
 Day 1. Finding that things that join up aren't necessarily attached... A fillet of epoxy between the thwart bulkhead and the side. Not really attached to the side. After removing the epoxy, there is about a 4mm gap. This is the inside, matching the position of the crack on the outside. After removing the paint around the crack on the outside. It has been around for a while, there are 2 different types of screws (Brass slotted screws and stainless square drive). Unfortunately, the screws are all in the front side of the break, going into some timber under the thwart. There is nothing to screw the back part into so it has moved, hence the gap inside. It hasn't been water tight but the wood is still good. While working on the hole, I found the thwart bulkhead wasn't just loose across the top and that it was only attached to the side about half way down from the top. After pulling that clear it is clear that water has gotten in but again, the wood is sound.  The lack of eviden...